Listing Grid - In Build Query Deep Dive
You should now already be familiar with the concept of the Listing & Listing Grid. If you haven’t please read the Concept page first.

To use Listing grid, you need to Create Listings First. Here’s the important part :
- Listing : Select the listing to use, Each Listings already specify List of posts along with the template.
- Use Random posts number : to get random order from the list.
- Load More / infinite scroll: Other options than using Jet Smart Filter Pagination widget. Load More / infinite scroll still have bug with Query Builder and not working properly.
- Use Custom Post Types : If you enable this and choose the custom post type, the Listing Grid will use this as the content inside the listing grid, while keep using the template that you make inside the listing. This is useful to show different post type that have similar / the same Meta key (you can use the meta boxes feature to enable the same key in multiple CPT). see concept page for explanation.
In Build Query Concept from Listing Grid

Custom Query*: Using custom query will ignore the subsequent query section and replace the posts list that are used in the listing grid. For details, see the Concept page.
Posts Query / Terms Query / Users Query :
This is the place where we specify the filter / order used of the posts list used in the listing grid. Use between Posts / Terms / Users Query depending on the type of data shown. Don’t use all three together.
- Use the Posts Query when dealing with Posts, Pages, Products, or any other CPT
- Use the Terms Query when dealing with Tags, Categories, or other Custom Taxonomy Type
- Use the Users Query when dealing with Users.
as explained in concept page, these query cannot add posts that doesn’t exist in the list.
Using Posts Query
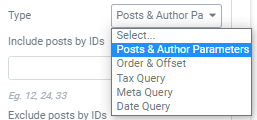
Use this when dealing with Post, Pages, or Custom Post Type. inside the post Query , you can add multiple filtering & sort for the lists of post in the listing grid. There’s 4 type of filtering :
- Posts & Author Parameters : Filtering by inherent attribute of the post (Post ID, Post status, Author, search query), This section will become very useful with Macros (Explained below)
- Order & Offset : Controls the ordering of the posts inside the listing grid
- Tax Query* : Filtering based on the taxonomy of the posts.
- Meta Query* : Filtering by the meta data available inside the posts.
- Date Query : Filtering the posts by the date it was posted, modified, etc.
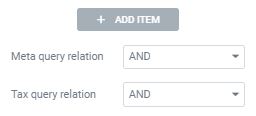
Even if you could create multiple filter of any type, You shouldn’t put 2 filter of the same type, except Tax Query & Meta Query. That is why There’s only Meta query & Tax query relation on the end of the posts query section.
Posts & Author Parameters
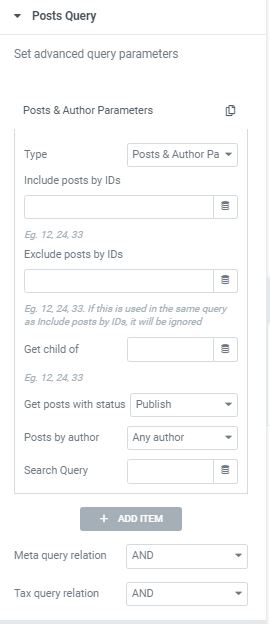
here you can filter the posts by :
- Include posts by IDs : listing the ID of the post you want to include manually (Note*: the id must already exists in the set of posts)
- Exclude posts by IDs : excluding the ID of the post that you don’t want to show in the listing grid. If you put something on the include post by id, this will be ignored. (Cannot use both)
- Get Child of (ID) : getting only the Child of post which ID specified here. This is NOT the Jet engine’s Relations Child. This is “Child post” from the Hierarchy feature if you enable it on the CPT
- Get posts with status : self explanatory, but when you enable Post & Author Parameters, the “Status” filter in general section is ignored.
- Posts by author : self explanatory
- Search Query : Filter by words. e.g : if you write “test” here, only the posts that contain the word test in either the title or the editor will be visible. If you put “-test” here, only the posts that doesn’t contain the word test in either the title or the editor will be visible.
In a glance, it seems we can only filter the post by putting the ID manually here, in that case it’s not very useful. But this is often combined with powerful Macro. In other words, those I will be automatically selected based on functions :
Posts & Author Parameters - Powerful Macro Function to Filter the IDs
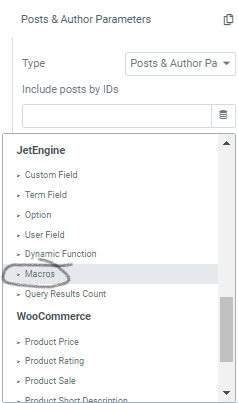
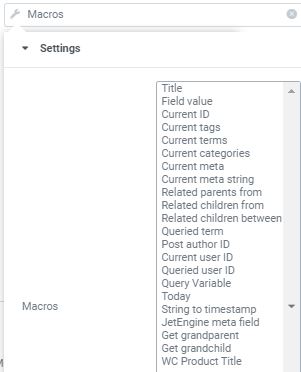
Instead of putting the included post ID manually, we will use the Jet Engine > Macros Dynamic tag. Here’s all the useful macro to use at the moment in that will return posts IDs:
- Current ID : getting the current post Id, usually used to exclude the current post on the list, e.g : you don’t want your current product to be included in the “other product you may be interested in” list.
- Related parents from : you need to select the Type of Post you’re getting (the parent post type) instead current post type. Yes the phrase is kind of misleading
- Related children from : you need to select the Type of Post you’re getting (the child post type) instead current post type. Yes the phrase is kind of misleading
- Related children between *Unknown :we can select 2 post type, and it should’ve spewed out all ID’s of their common child, but it’s not clear since it should be a common child between 2 specific post instead of 2 whole post type.
- Get grandparent : you need to select the Type of Post you’re getting (the grandparent type) instead current post type. Yes the phrase is kind of misleading
- Get grandchild : you need to select the Type of Post you’re getting (the child grandchild post type) instead current post type. Yes the phrase is kind of misleading
- JetEngine meta field : If you want to get the list of ID from a meetafield in the current post, it’s also possible.
NOTE* : all the macros above will get the related parents, children, grandparent, grandchildren, from the Current Post. If you want to show the parents, children, grandparent, grandchildren, etc of other post. you need another trick to do that.
There are other macro that can be written manually in the field using %macro-name% instead of dynamic tags. the full list can be found here.
Order & Offset

This section only order the posts list by certain field, and can also order it by one of it’s Meta value.
Tax Query* (can be multiple)
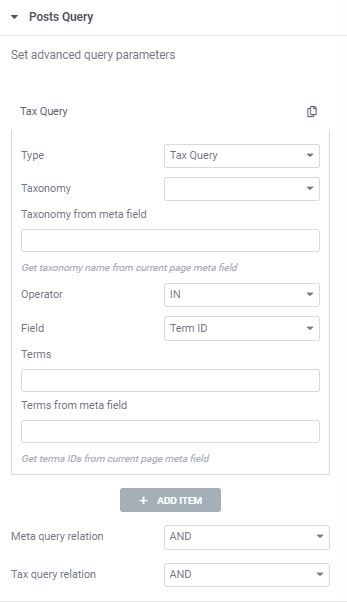
- Taxonomy. In this drop-down menu, you can select the type of taxonomy applied to the posts. All available taxonomies will be listed there;
- Taxonomy from meta field. If you have a meta field where you type in the taxonomy name, you can use it here. The value of the meta field will be used as a taxonomy for query. If you use this field, the operator, field, terms, & terms from meta field will be ignored.
- Operator. This field defines how different terms will work together.
For example, we put “a,b” in Terms, and set Field to “name”.- IN operator shows all the values in the chosen taxonomy.
e.g : show all posts with taxonomy “a Or b” - NOT IN hides all the items that are applied to the chosen term.
e.g : hide all posts with taxonomy “a Or b” - AND operator allows the existence of multiple conditions.
e.g : hide all post with taxonomy “a And b” - EXIST is used to test the existence of any record in a subquery.
e.g : show all post that have least have a taxonomy (regardless of what taxonomy it is, “a,b” is ignored) - NOT EXIST performs the opposed action;
e.g : show all post that doesn’t have any taxonomy (ignoring the “a,b”)
- IN operator shows all the values in the chosen taxonomy.
- Field. Here you can choose how to display the terms: by Term ID, Slug, or Name. If you’ve chosen the Term ID, you should fill in the Terms field with the macro %current_terms% to display the posts with the same terms as the main one on the page. To add more terms to the current ones, you can simply enter the needed IDs separating them with a comma;
- Terms. According to what you have chosen in the Field menu, here you have to type in the ID, slug, or name of the needed term;
- Terms from meta field. If you have the meta field where you put the terms data, you can use it to set the term dynamically. Haven’t tested it, but supposedly if you put this, the “Field” & “Terms” field will be ignored in favor of this.
Usable Macro in Tax Query Terms Field (make sure the field is set to Term ID):
%current_terms% – this will be used most Often than the rest. returns current post terms; you may specify a taxonomy to return terms from – %current_terms|taxonomy_slug% in case one has a custom taxonomy, this macro helps query the current terms to display the posts related by the terms on the Single post’s page.
%current_categories% – returns current post categories;
in order to exclude the specific category term from showing up, add the Tax Query query type in the Posts Query block and specify this macro in the Taxonomy: Categories block in the Terms field.
%current_tags% – returns current post tags;
to exclude the specific tag from showing up, you need to add a new query item and then select the Tax Query query type and Tags in the Taxonomy field and type this macro in the Terms field and specify IN operator.
%queried_term% – returns the ID of the term on its archive page or in a Listing Item of Terms;
insert this macro in the Terms field, settings Posts Query block (Type: Tax Query > Taxonomy: Category) in Listing Grid widget to display related posts from the specific term.
Meta Query* (can be multiple)

- Key (name/ID). Here you need to enter the ID or name of the Meta Field. The value of that meta field will be compared to the one you set; Unfortunately, there’s no dropdown / dynamic tag capability in this field so you have to enter the meta key slug yourself.
- Operator. This field defines how the values will be compared:
- Equal – displays posts having an equal value;
- Not Equal – shows posts that don’t have an equal value;
- Greater than – shows posts that have a greater value. It works with numeric values only;
- Greater or equal – displays posts that have a greater or equal value. It also works only for numeric values;
- Less than – shows posts that have a lesser value. For numeric values only;
- Equal or less – displays posts that have a lesser or equal numeric value;
- Like – shows posts that have the value you set in the Value field mentioned in the content;
- Not like – displays only the posts that don’t have the value you’ve set in the Value field mentioned in the content;
- In – after you add several values to the Value field, it shows the posts that have at least one of them in their content;
- Not in – displays posts that have any values except the ones you typed into the Value field;
- Between – displays posts that contain the value between two, which are set in the Value field;
- Not between – shows all the posts except the ones that contain a value that matches the set interval;
- Exist – shows all the posts that contain the Key. You don’t need to set the Value in this case;
- Not exist – displays all the posts that don’t contain the Key. You don’t need to set the Value either.
- Value. The value you’ll type in here will be compared with the values in the Key meta field;
- Or get value from query variable. This field allows you to take the value from the URL. Just paste the URL to the field and choose the Operator;
e.g : you put “data” in key name, & put “test” here without the quote, then open the page and add “?test=super” in the url, it will automatically filtered to that - Type. In this drop-down menu, you can choose the type of the Meta Query Clause;
- Meta Query Clause. *still a mystery : After you type in the unique name here and hit the “Update” button, the clause you’ve just created will become available in the Order&Offset query. This way, you will be able to order the posts according to a custom clause.
Date Query
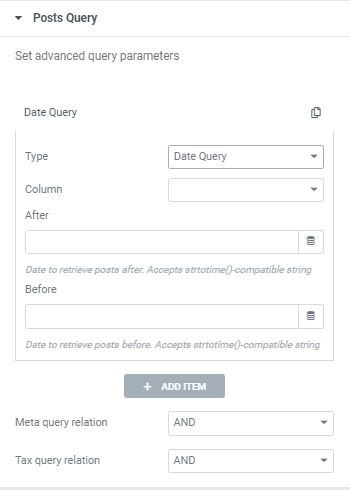
- Column. In this drop-down menu, you can choose the type of date you want to use. It could be the date of post creation or modification;
- After. If you set a date here, only the posts created or modified after that date will be shown;
- Before. With the help of this field, you can make the grid display only the posts that were created or modified before the date you set.
Note* : This is only for the Post inherent date (date of creation, modification, etc), if you want to filter Date from your meta data, use Meta Query instead.
Using Terms Query
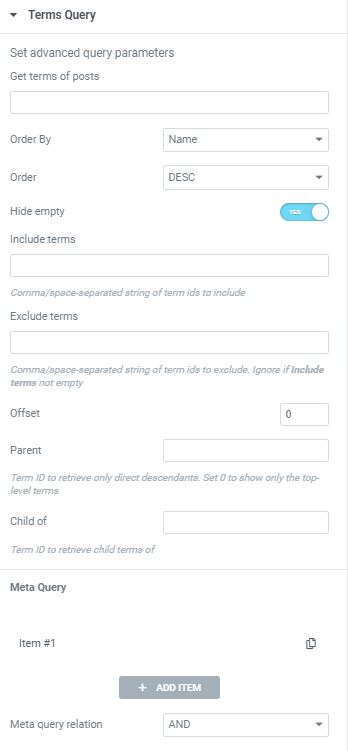
Use this when dealing with Tags, Categories, or Custom Taxonomy types.
- Get terms of posts. If you want to display the terms attached to a concrete post, type the ID of that post here. You can insert several IDs, separating them with commas;
- Order By. In this drop-down menu, you can choose by which parameter the terms will be sorted:
- Name – by the first letters of term’s title;
- Slug – by the first letters of term’s slug;
- Term Group – by the number of groups determined in the DataBase;
- Term ID – by numbers of term’s ID;
- Description – by the first letters of the description’s first word;
- Parent – by the first letters of the parent’s name;
- Count – by the number of posts that are assigned to this term;
- Include – by the order in which you put the IDs to the Include terms bar;
- Order. It can be ascending (ASCD), which means from the smallest value to the biggest, or descending (DESC) – from the largest to the smallest;
- Hide empty. If the item has no defined value, it won’t be shown in the grid;
- Include terms. In case you want to display only some specific terms, type their IDs separated by commas into this bar; We can use the macro %current_terms% for filtering the query to include the the terms (taxonomy) of the current page. We can also use other macros specified in the Post Posts Query – Tax Query
- Exclude terms. Type here the IDs of terms that you don’t want to be shown in the Listing Grid; This will be ignored if you put something in include ters. We can also use macro in this field.
- Offset. When you type the number into this bar, that number of terms that go first in the list won’t be shown in the grid;
- Parent. Type in the ID of the term here and the parent taxonomy of that term will be shown in the grid. If you set this feature to 0, it will leave only the top-leveled terms in the grid (the ones that have no parent taxonomies);
- Child of. If you want to display in the grid only the terms of a specific taxonomy, type its ID here.
You can set Meta Query
Using Users Query
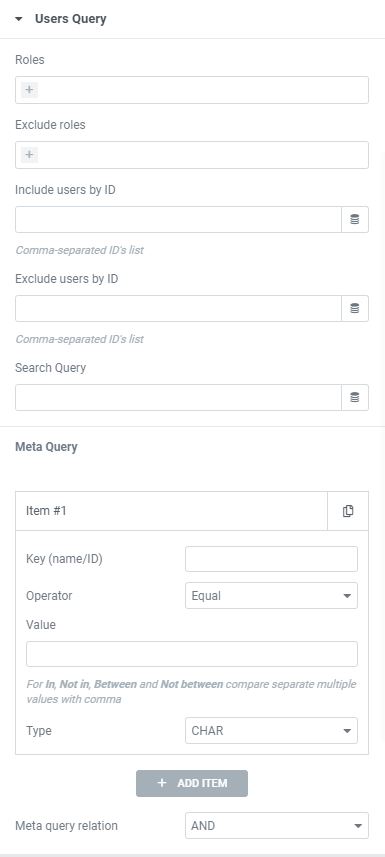
Use this when dealing with Users.
- Role. The drop-down menu with a list of user roles will open after clicking on the cross-shaped icon in the left corner. You can choose several options here. Only users with the role you selected will be shown in the Listing Grid;
- Exclude roles. The same story here – you will see the roles list after clicking on the cross icon and be able to choose several options. The roles you select will be excluded from the Listing Grid;
- Include users by ID. If you want to show only a few particular users in the Listing Grid, you can type their IDs separated by commas here; (can use Jet Engine’s macro)
- Exclude users by ID. You can also exclude some of the users from the Listing Grid by typing their IDs separated by commas here; (can use Jet Engine’s macro)
- Search Query. If you want to display only users having a certain value in one of their default meta fields (like Login, Email, or URL), you can type that value here. Afterward, choose the default meta field in the Search Columns drop-down menu (will appear if you type something). The typed-in value will be searched in the fields you have chosen in the Search Columns list. Only those users who have that value in the chosen fields will be shown in the Listing Grid.
We can also add filtering based on meta key in the taxonomy, but this is pretty similar to the Meta Query in the Post Query – Meta Query , you can refer that above.
We can use Jet Engine’s – dynamic tag’s macro for the include / exclude user ID.
- Post author ID
- Current user ID
- Queried user ID
- Jet Engine Meta field
We can also add filtering based on meta key in the users query, but this is pretty similar to the Meta Query in the Post Query – Meta Query , you can refer that above.
Done!
We have hammered in the concept !
Very Brief Summary of everything we learned so far :
- Create a Custom Post Type, Custom Taxonomy, or add Meta Boxes to existing data.
- Create Listings – Specify the type of post / taxonomy it use & make the template
- Use Listing Grid – set the listing Grid to use the Listing we created.
- If using Query Builder : Your post list has been filtered by the query, you’re set to go
- Otherwise : Filter & Order the data as you want, using Posts Query / Terms Query / Users Query.
Now we can play around testing it live in the testing ground. Let’s start off easy by getting query from the “Current page”, let’s go to Test 1 Page.
Note* : We don’t delve deep in Query Builder, because it’s very similar to in Build Posts Query / Terms Query / Users Query, but are just put in a single place.