Can have Multiple Pins like display above in the example. The pin icon can be customized, the content popup of each pin is using text editor that you can design freely, and can be linked & set initial state to be shown or not.
Adding Address Location
There’s 3 way to add location:
Address (Somewhat less reliable)
Coordinates
DMS Format of Coordinate
To add a location in Advanced map, go to google map. and search your location. e.g : puri indah mall
1. Address : write your own address or copy the address found in google map
Most of the time it will say coordinates not found.
2. Coordinate (Best Recommended)
Right Click on the pin and click on the coordinate to copy it.
Change the format first!
you will get a comma (,) delimited coordinate, but the widget use semicolon (;) as separator or it will spew coordinates not found.
For comparison, here’s the normal map Widget by elementor (can set zoom level & height only) but can only show 1 pin. decide if the default map is enough because the advance map require google map api & a bit complex:
The advance map requires Google Map Api
The advanced map requires the use of Google API. you can put the api key in Crocoblock > Jet Plugins Setting > Jet Elements > Integrations.
Google Maps API is Not Free. but it has limited “Free” usage per month, learn the setup below.
If you haven’t put it or it’s not setup correctly, it will show Coordinates not found. Learn to set it up below.
Getting the API (Complete Guide)
Make sure that the API are enabled to use Geocoding & Maps Javascript Api
Then Select the newly created project, and enable the required API in the API Page
Then go to Credentials & Create an API key
Copy The Key and put it in Jet Elements
The API is Not working Yet
Google change it’s Terms & Condition, so the API will not work if the project doesn’t get linked with a Billing Account.
To set it up, go to Overview, and go to Billing. If you don’t have a billing account yet, create one. Yes you need a credit card, but they won’t charge it yet.
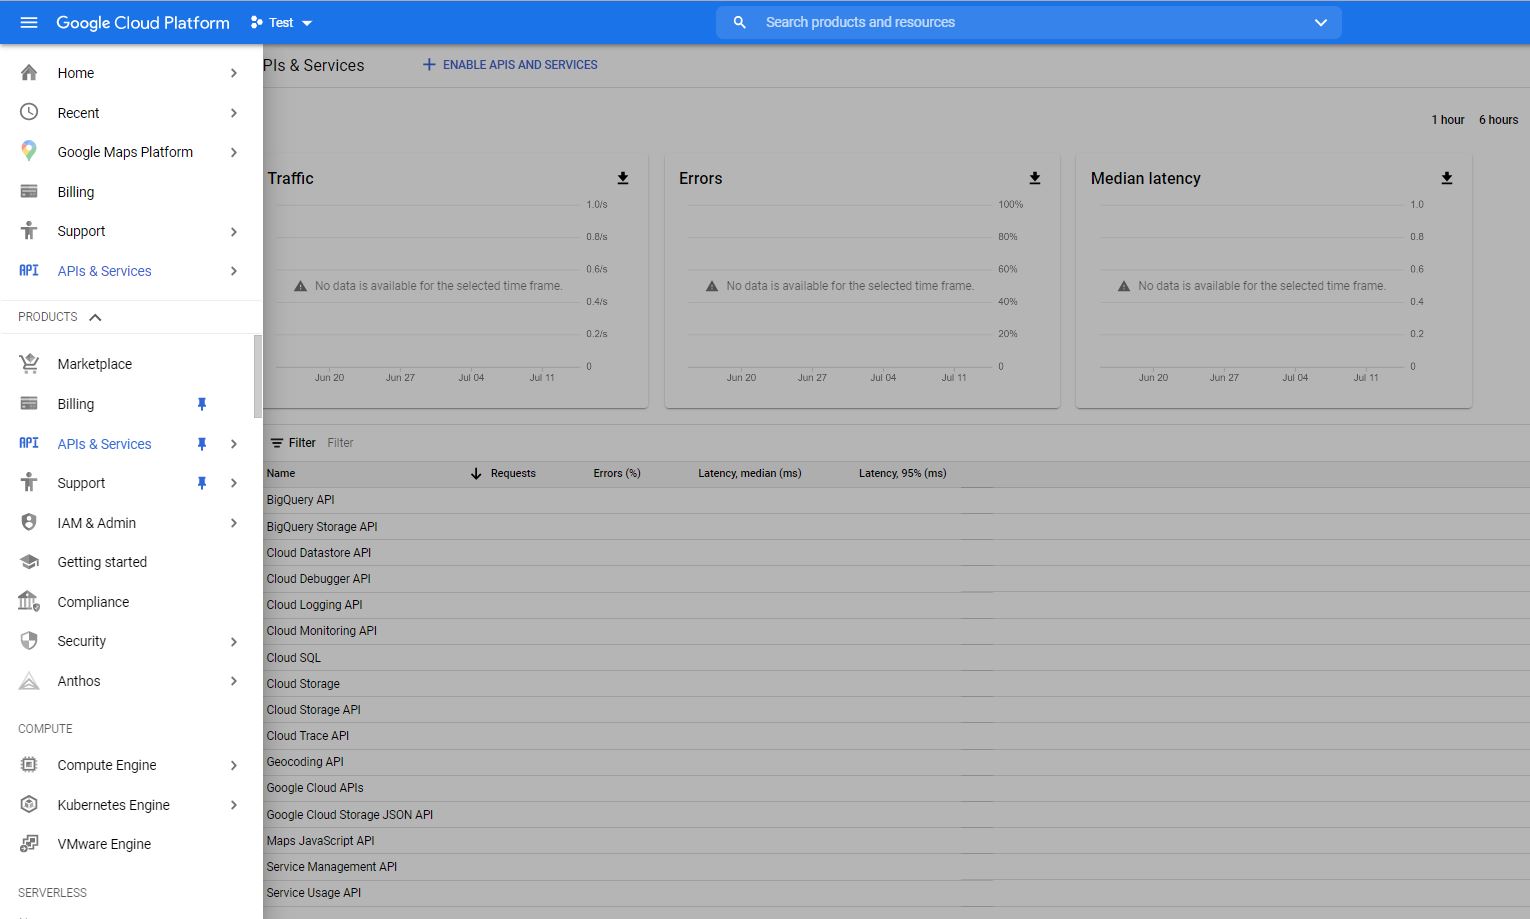
Set Your Google Cloud Platform Dashboard right, & pin relevant menu.
Google Maps Platform : The API we use
Billing : Information about your Billing Account
Support : In case you need further help, there’s live chat options in english
API & Services : just overview, but you can check it in Google Maps Platform.
If you done it correctly & connect a billing account, your API should be working now. But...
Test your Advanced Map widget if it works properly, if it does, now is the time to protect ourself :
To protect ourself, we need to set 3 things
API Request Cap
Budgets & Alert
API restriction
1. Set Request CAP (MOST IMPORTANT)
Every month as of now (July 2021) google still giivng a recurring $200 credit that we can use monthly for free. We need to limit the request usage so that it doesn’t go over the buget. the pricing table can be found here :
as of now the $200 credit enable us to request 40,000 Geocoding calls or 28,000 Maps Javascript API call .
So we need to divide that equally because they share the same $200 pool, to become :
20,000 Geocoding call / month
14,000 Maps Javascript API call / month
Which roughly translated to :
666 Geocoding call / day
466 Maps Javascript API / day
Make Sure to set the limit in : – Google Map Platform > Quotas > Geocoding API (Request) -> 666 – Google Map Platform > Quotas > Maps Javascript API -> 466
2. Set Budget & Alert
Go to Billings > Budgets & Alert, set the budget limit.
This budget alert Doesn’t limit the api usage. it only notify us if the spending have exceed the treshold. Since our account is in rupiah, convert the $200 USD to IDR, and lower it a bit to set a budget notifier.
3. Put API Restriction
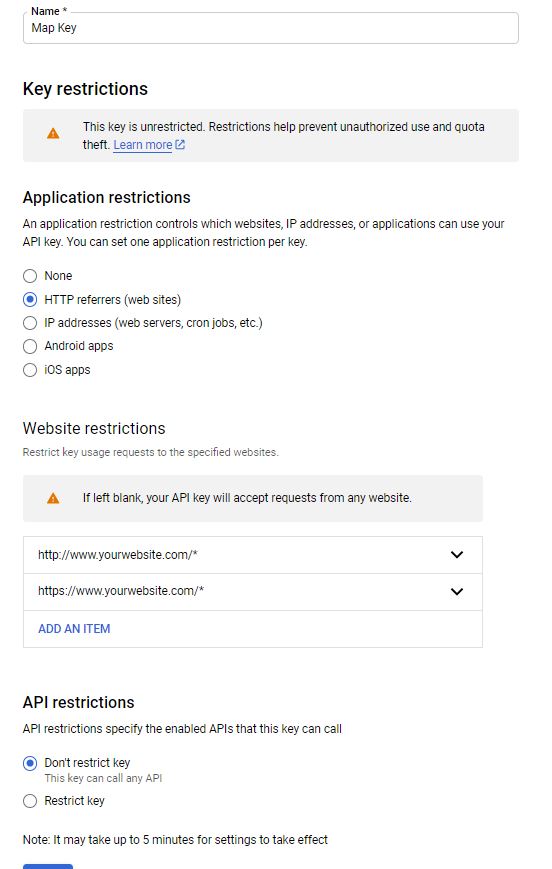
Add HTTP Restriction so that the api key can only be accessed by your website.
NOTE THAT THIS RESTRICTION CAN BE BUGGY
google told you to put *.yoursite.com/*
to accomodate all sub domain & all url in the site. Which is not working. Even the subdomain wildcard is not working. For now, the only one working is using set of http:// & https:// link to your site with wildcard at the end.
See the example in the left.
After this, Save it & check to use the advanced map again, if it return to coordinates not found, then you have to fiddle with the link until it works. (because leaving no http restriction means anyone can use your API if it gets leaked and steal your quota)
Avoiding violation of TOS
The $200 credit limit is not applied per account, but applied per billing account, thus you can make new billing account per API. BUT 1 API can only be used in 1 website